

Here’s another DIY Disney Christmas Ornament idea for you. Confession time: Sometimes my creativity and my actual artistic ability are at odds. In the case of this ornament, I had a good creative plan (says me) – the execution of which was negatively impacted by my lack of artistic ability…in other words, I…well….I pretty much suck at painting – even with pointy-ended bottles of sparkly paint.
But I bet YOU can paint well and that’s why I’m still sharing this project with you (though I was a little underwhelmed by my own results). You can do better and the supplies are minimum. Plus the idea is pretty neat since you can change the colors (and ornament sizes) to match your theme. For example, if you have a Disney Princess tree you could use pink, purple, gold, pastels, etc. That’s the fun thing about DIY projects – the flexibility!
I saw the inspiration for this ornament the last time I was at Disney World (May, 2012) and decided that it looked EASY and I’d give it a go. HA! Anyway, these ornaments were both fragile and not really in my budget at the time I spied them, so I took a quick picture and vowed to just crank out some gorgeous (fancy and sparkly) duplicates in the near future – that time came coincidentally as I shopped (c’mon, say it with me now) the 50% off Christmas decorations at my favorite craft store.
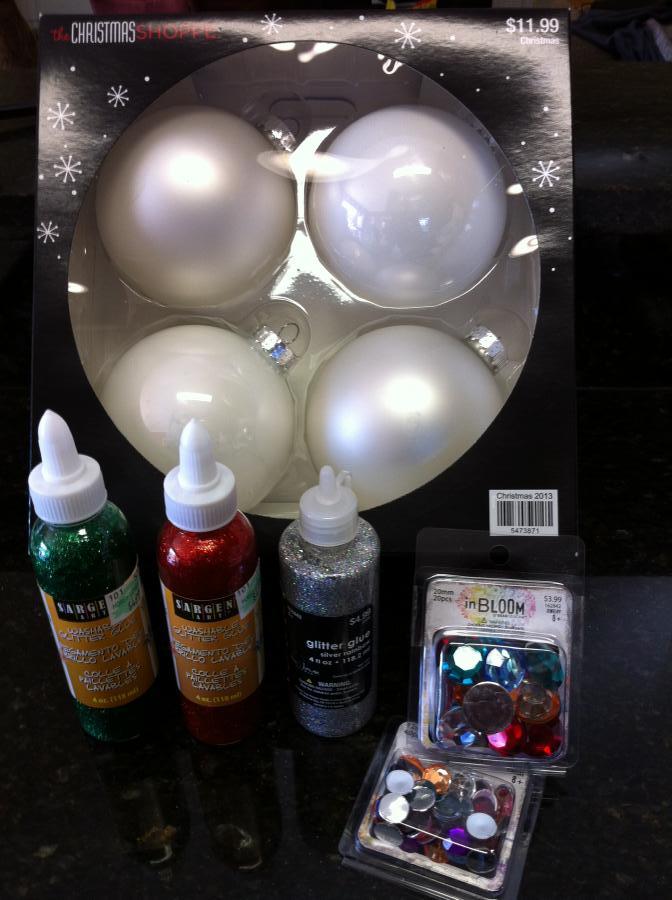
So I bought my supplies – a box of four white ornaments (two are shiny and two are matte/pearl), two sizes of bulk rhinestones, red and green glitter paint, and some silver glitter glue (for attaching the rhinestones).
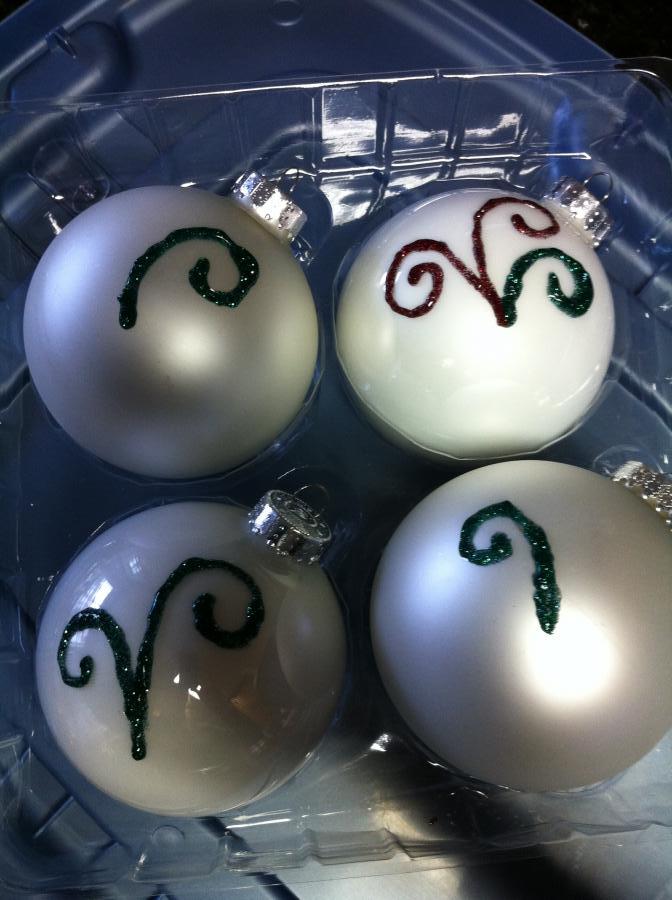
Once situated at home with all the necessities, I started painting swirly-things. YIKES. Harder than I thought. I really wanted to make my ornaments look exactly like the originals, but it was just not going to happen for me. So I stuck with VERY basic swirls and had to be satisfied with that. Luckily, when they finally dried (oh, I was impatient and it seemed to take forever) – they looked less gloppy and uneven to me (maybe. a little.).
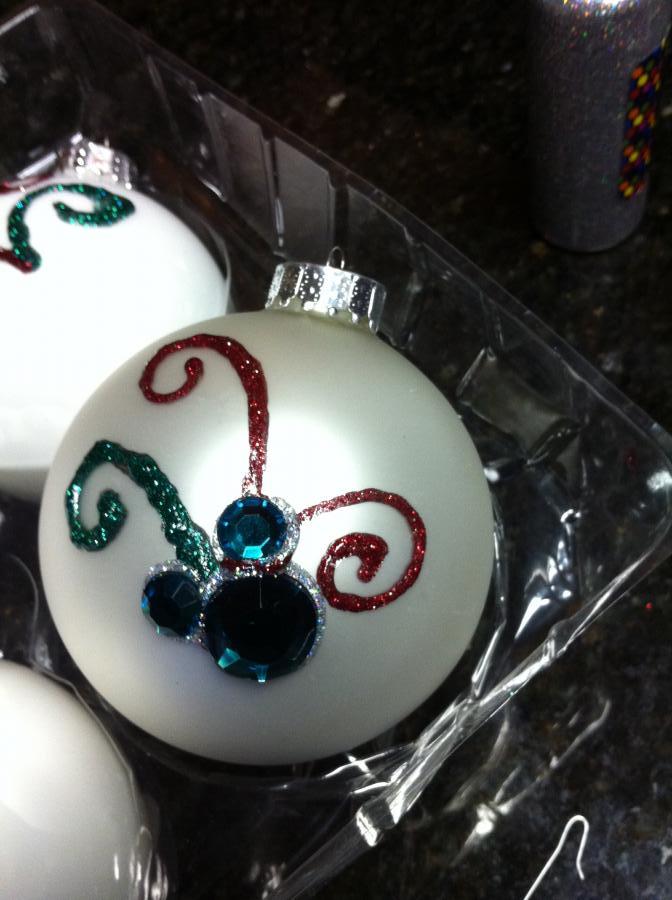
Once the swirls dried, I used the silver glitter glue (oh, has a more fun substance ever been invented?!) to attach the rhinestones in the classic Mickey head shape. Buying multi-colored stones in a pack was not very smart – the reds and greens weren’t as plentiful as I’d hoped. So, I got only one group per ornament. Just as well since the whole painting thing was dicey. In the end, I was happy enough to actually put them on the tree. The Fam (as usual) cheered me on and made me feel better about my expectations exceeding reality. Really, they could be so cute when done by someone with actual artistic talent – that’s where you come it. PLEASE – if you try this and end up with pretty ornaments, share a picture with me! I’ll try not to be too jealous and I’ll post the picture right here on my Disney blog.
Good luck. I have faith in you. You can do it!
This article was originally posted on the Living a Disney Life Blog.
No comments:
Post a Comment
Thank you for your feedback. Comments will appear pending moderation.