Showing posts with label Ornament. Show all posts

Tuesday, December 1, 2015

Flea Market Find: Disney World Millennium Ornament

By: Nick Maglio
I spotted this great Walt Disney World glass ornament from the Millennial Celebration at the flea market the other day for $3.00, and snatched it right up.


I really find it interesting, and appreciate, that Spaceship Earth is the focal point instead of Cinderella Castle.


Another great flea market find!

Sunday, December 14, 2014

Flea Market Find: EPCOT Center Ornament

By Nick

I bought this glass ball Epcot Center ornament from 1985 at the Columbus Flea Market a couple of years ago.

I am constantly on the lookout for reasonably priced Epcot ornaments on Ebay, but this is the first time I’ve found one at the flea market. And at a price that I couldn’t believe. More on that later.
First let’s take a look at the ornament.

Not the most colorful of ornaments, but I love the graphics, which depict the pavilions existing in Future World at that time.

Here we have, of course, Spaceship Earth with the Monorail going by.

As we turn the ball, we have the Journey Into Imagination…

… and next to that, the Universe of Energy.

Then, maybe the artist realized he was running out of room, so put The World of Motion, and my beloved, and much missed, Horizons, pretty much on top of each other. Next to that is The Land.

A terrific addition to my Epcot collection. And the cost? $.50!

Saturday, December 13, 2014

Disney Tree, Oh Disney Tree

By Lisa Green

If you’ve been by here for a visit lately, you’ll have noticed that I’ve been sharing all my tutorials on how to make Disney Christmas decorations.


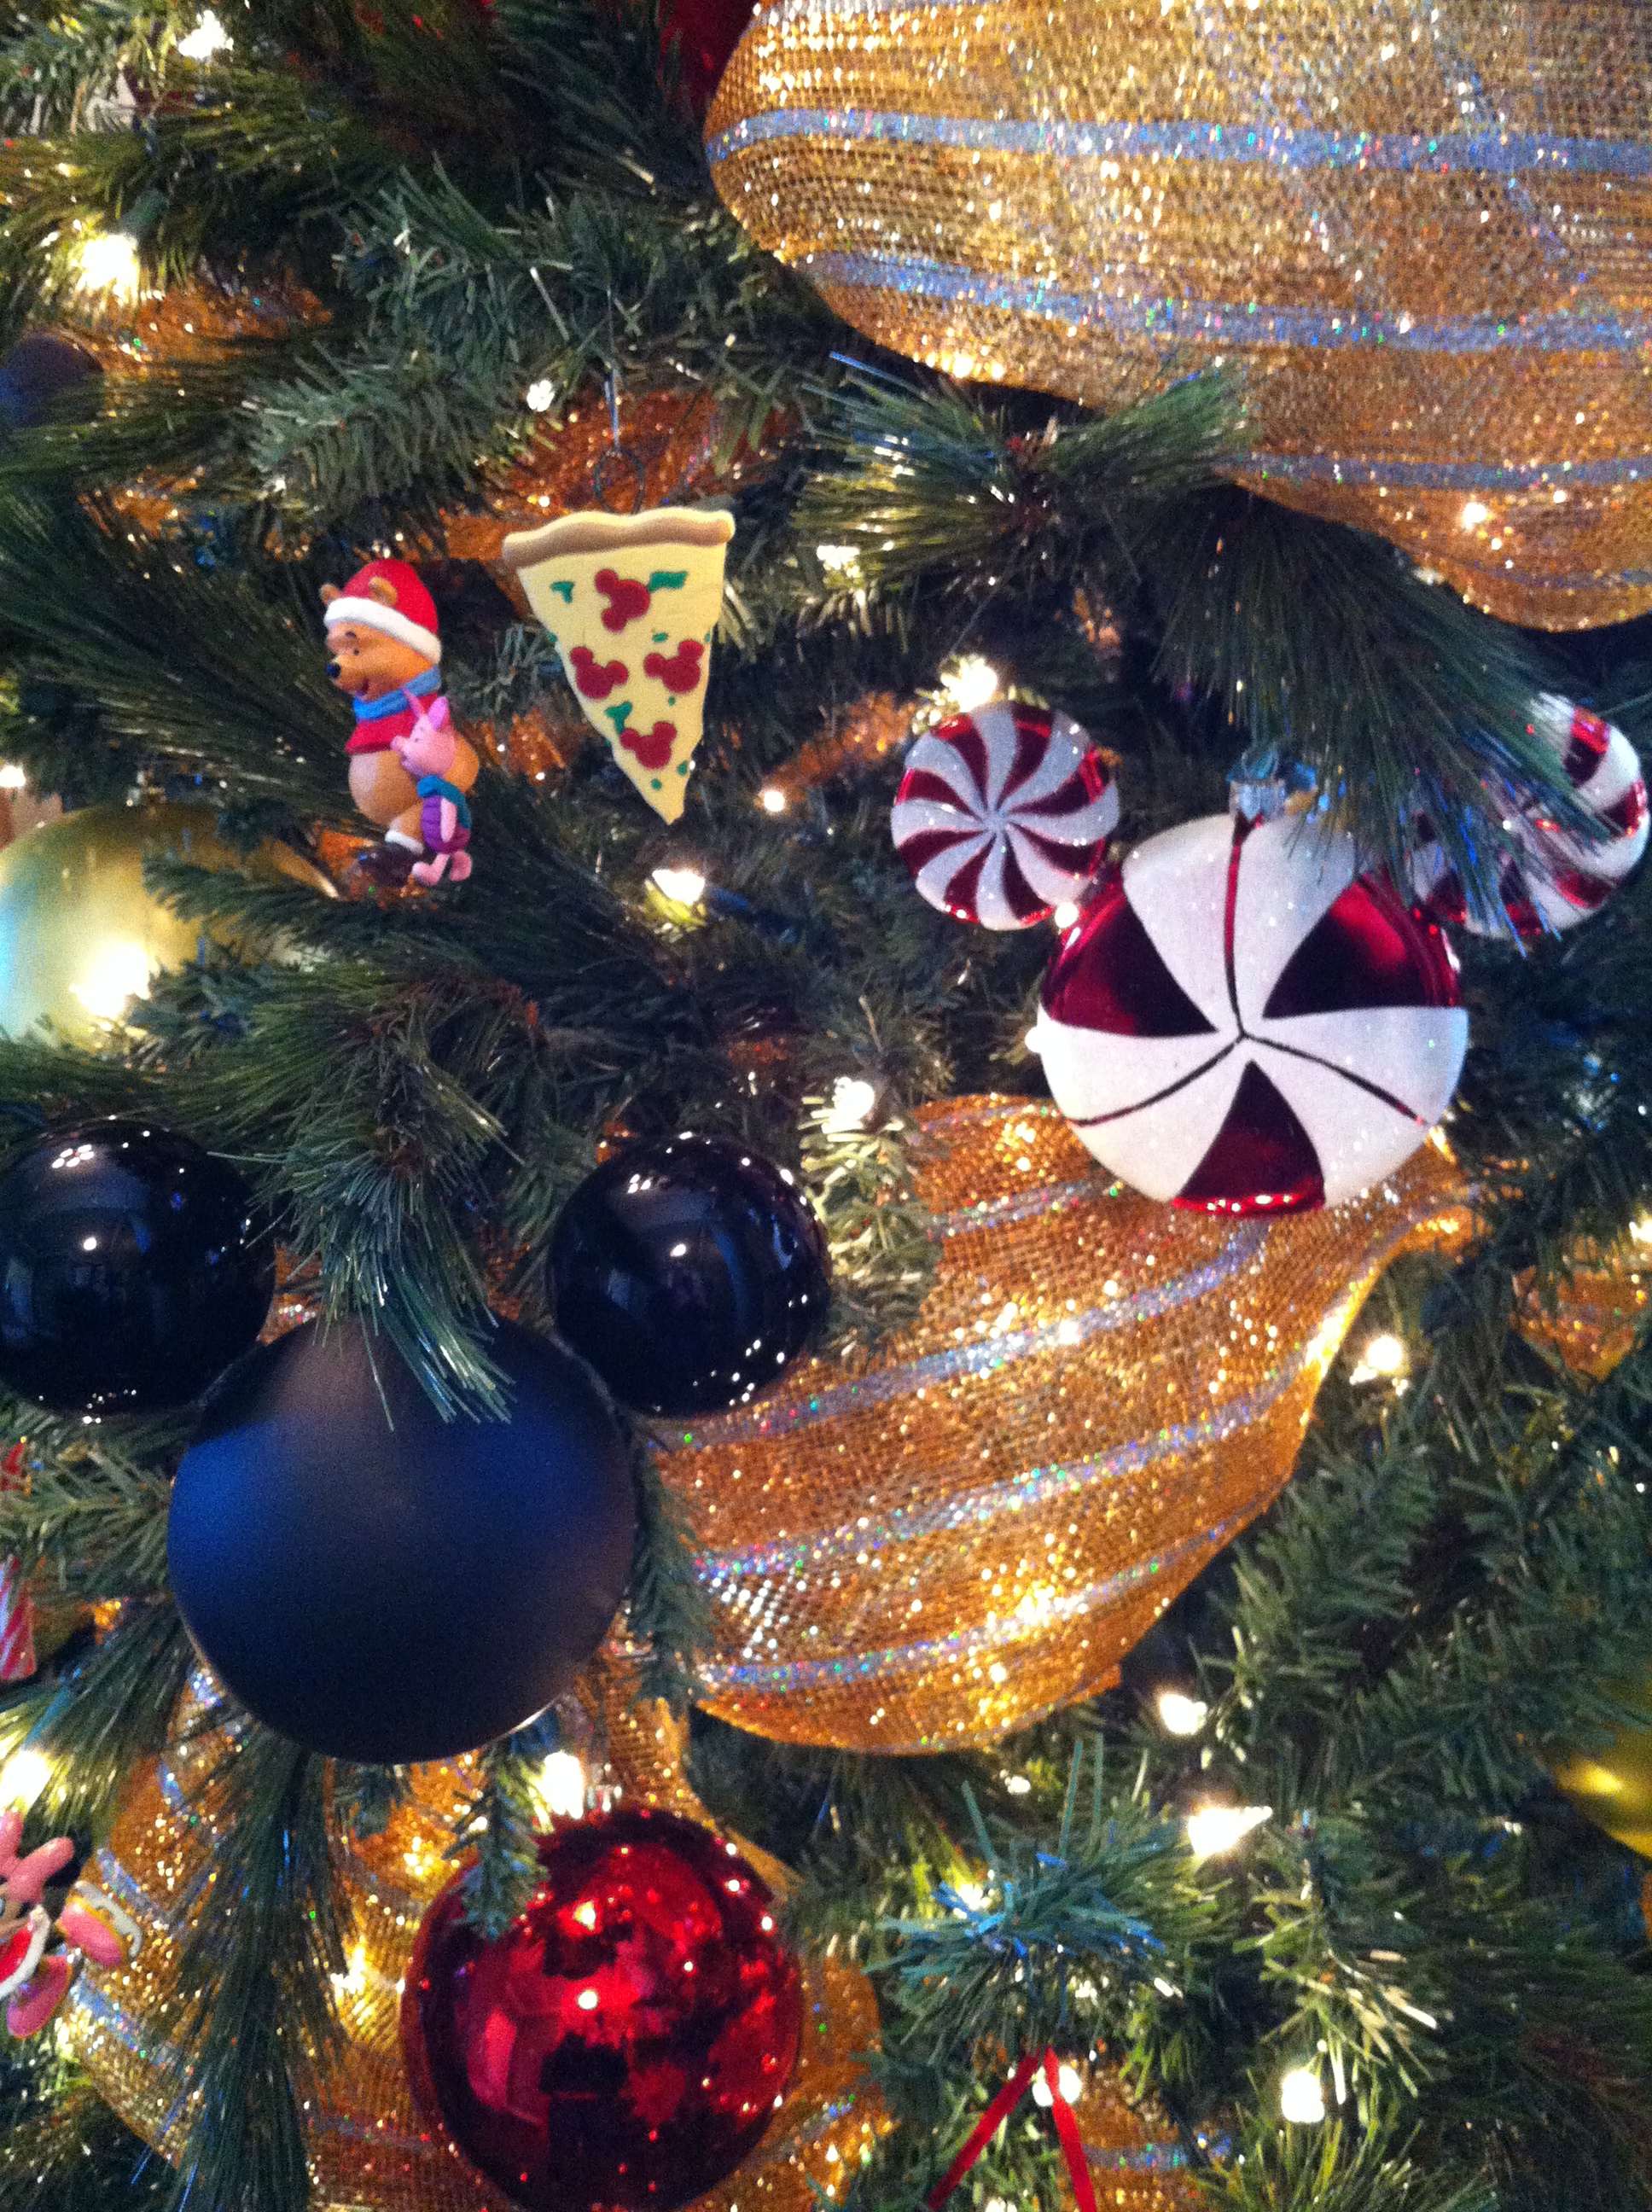
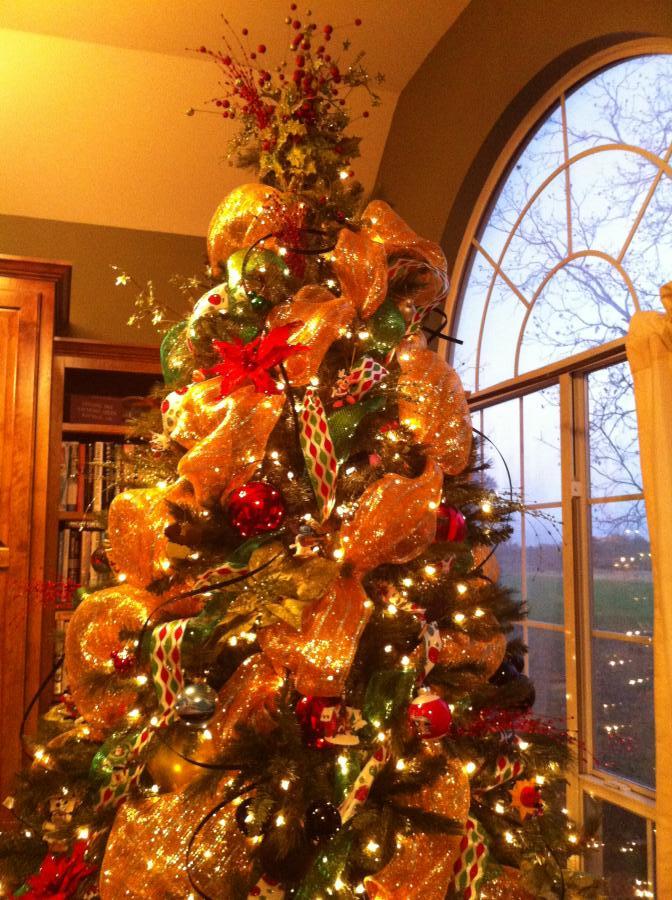
The ornaments are all hanging on my Christmas tree, so I thought I’d share a few tips on how I put the whole Disney theme together. I started with a pre-lit 9-foot tree purchased several years ago – say it with me now- for 50% off at my favorite craft store! Before the ornaments go on, I want the tree to feel Disney-ish, so I start with what I consider foundation or background for the ornaments. I don’t have an official Disney tree-topper (gasp!) so I tried to make the top of the tree represent the “Wishes” fireworks from the Magic Kingdom since Wishes is one of my most favorite things in the world. I used several large Christmas floral sprays in sparkly red and green, adding a couple to the center that had circles that would (hopefully) form Hidden Mickeys when viewed from Copy-of-General-Dis-Pics-11.13-061.jpgdifferent angles. Then, starting at the top, I added yellow/gold deco-mesh – I dislike (hate/loathe-take your pick) deco-mesh and it seems the feeling is mutual. I put it on the entire tree three different times this year and I still think the final look leaves a bit to be desired. Suggestions are welcome. Then on went green and red poinsettias, holly, green and red sparkly floral sprays, and black sparkly dangly-ropey-things (what would you call them?). 


Foundation in place, I was ready for the ornaments. Even before the official (and unofficial) Copy-of-General-Dis-Pics-11.13-061.jpgDisney ornaments went on, I first added large, plain ornaments in Disney colors, tucked back into the tree – so they would fill up the background while keeping the outer branches available for the best ornaments.


Then, finally ready for the Disney ornaments, I used the smallest ones at the top and worked my way down – largest mostly on the bottom. Okay – I’ll admit it – I talked Raymond into putting the little ornaments at the top for me. He’s way taller and it kept me from repeating the terrible ladder accident I had last spring. That’s it.  Tah-Dahhhhh.


I’ve surfed the net looking for other Disney trees out there. I know some of you have them, so please PLEASE share your tree pics with me and any DIY Disney decorations you’ve made. I would love to see them and get some new ideas for next year.

Thursday, December 11, 2014

DIY Mickey Mouse Christmas Ornaments - Part 3

By Lisa Green


Here’s another DIY Disney Christmas Ornament idea for you.  Confession time:  Sometimes my creativity and my actual artistic ability are at odds.  In the case of this ornament, I had a good creative plan (says me) – the execution of which was negatively impacted by my lack of artistic ability…in other words, I…well….I pretty much suck at painting – even with pointy-ended bottles of sparkly paint.

But I bet YOU can paint well and that’s why I’m still sharing this project with you (though I was a little underwhelmed by my own results).  You can do better and the supplies are minimum.  Plus the idea is pretty neat since you can change the colors (and ornament sizes) to match your theme.  For example, if you have a Disney Princess tree you could use pink, purple, gold, pastels, etc.  That’s the fun thing about DIY projects – the flexibility!

I saw the inspiration for this ornament the last time I was at Disney World (May, 2012) and decided that it looked EASY and I’d give it a go.  HA!  Anyway, these ornaments were both fragile and not really in my budget at the time I spied them, so I took a quick picture and vowed to just crank out some gorgeous (fancy and sparkly) duplicates in the near future – that time came coincidentally as I shopped (c’mon, say it with me now) the 50% off Christmas decorations at my favorite craft store.

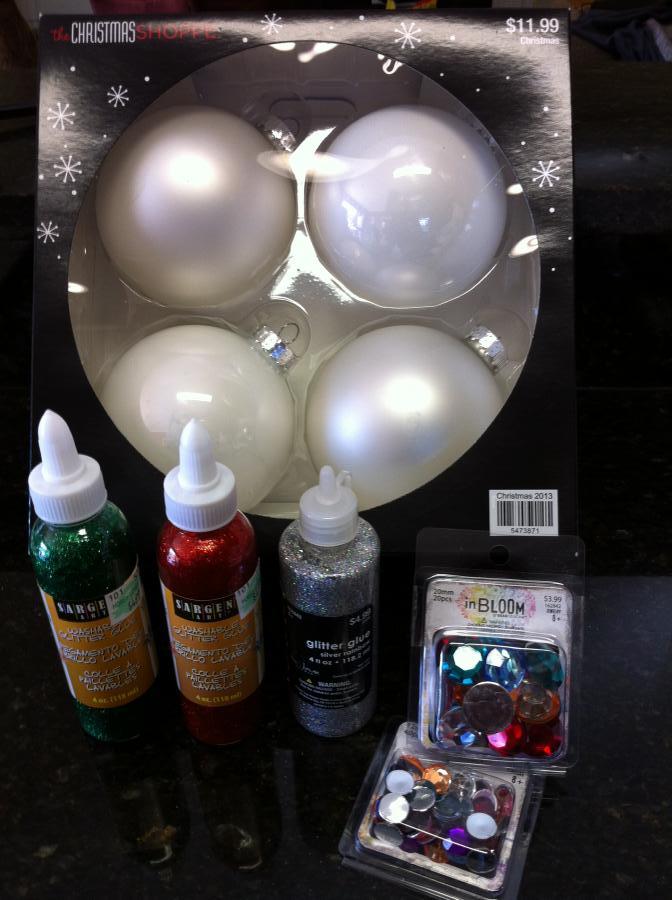
So I bought my supplies – a box of four white ornaments (two are shiny and two are matte/pearl), two sizes of bulk rhinestones, red and green glitter paint, and some silver glitter glue (for attaching the rhinestones).

General Dis Pics 11.13 014

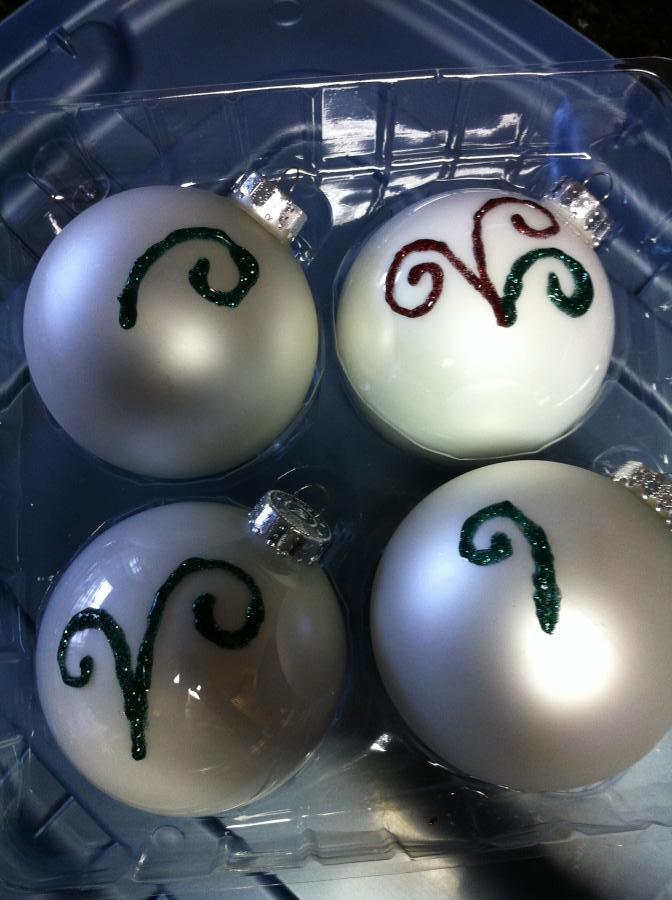
Once situated at home with all the necessities, I started painting swirly-things.  YIKES.  Harder than I thought.  I really wanted to make my ornaments look exactly like the originals, but it was just not going to happen for me.  So I stuck with VERY basic swirls and had to be satisfied with that.  Luckily, when they finally dried (oh, I was impatient and it seemed to take forever) – they looked less gloppy and uneven to me (maybe.  a little.).

IMG_2155

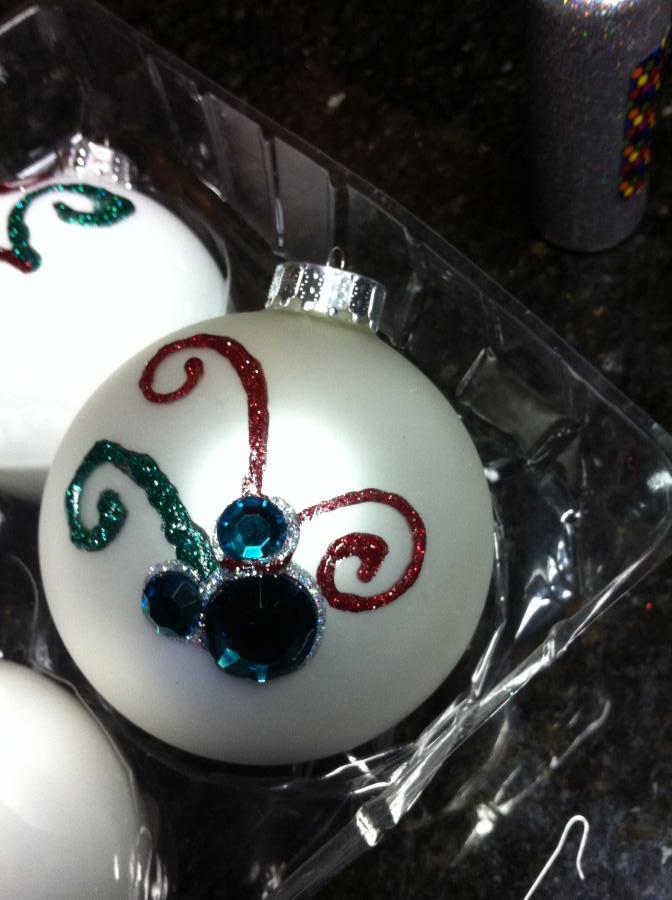
Once the swirls dried, I used the silver glitter glue (oh, has a more fun substance ever been invented?!) to attach the rhinestones in the classic Mickey head shape.  Buying multi-colored stones in a pack was not very smart – the reds and greens weren’t as plentiful as I’d hoped.  So, I got only one group per ornament.  Just as well since the whole painting thing was dicey.  In the end, I was happy enough to actually put them on the tree. The Fam (as usual) cheered me on and made me feel better about my expectations exceeding reality.  Really, they could be so cute when done by someone with actual artistic talent – that’s where you come it.  PLEASE – if you try this and end up with pretty ornaments, share a picture with me!  I’ll try not to be too jealous and I’ll post the picture right here on my Disney blog.

 IMG_2157

Good luck.  I have faith in you.  You can do it!

This article was originally posted on the Living a Disney Life Blog.

Monday, December 8, 2014

DIY Mickey Mouse Chritsmas Ornaments - Part 2

By Lisa Green


In my last post about DIY Disney ornaments, the ornaments were super easy to make and cute as can be, yes?  Let’s do it again today – make more Mickey ornaments, but this time, we’ll go “intermediate” level – I think you’re ready!

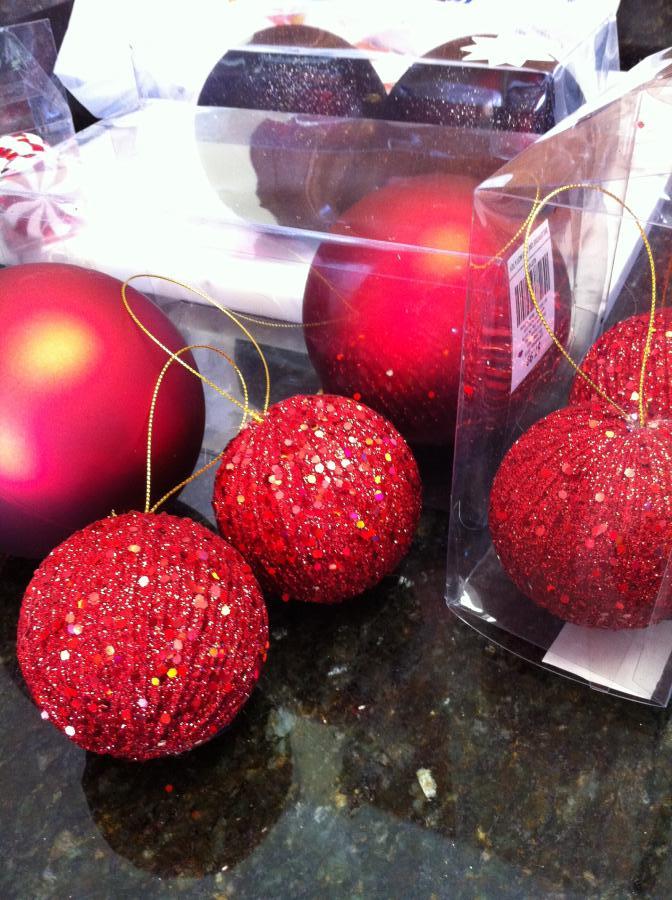
While shopping at my favorite craft store (again, yes, I like it there and yes, Christmas decorations were still 50% off) – I spotted these babies and thought – hey!  With a little help from Raymond and his manly tool-wielding-ways, I can really make some fancy new ornaments.  As luck would have it, Raymond was with me.  So, I shot him a look (no words required) and he held out his hands to carry the ornament boxes for me.  Gotta love a man that’ll shop and carry at your favorite craft store…and I do!

Do this:

Buy shatterproof ornaments only.  On sale.  (Hey, my tutorial, my rules.)


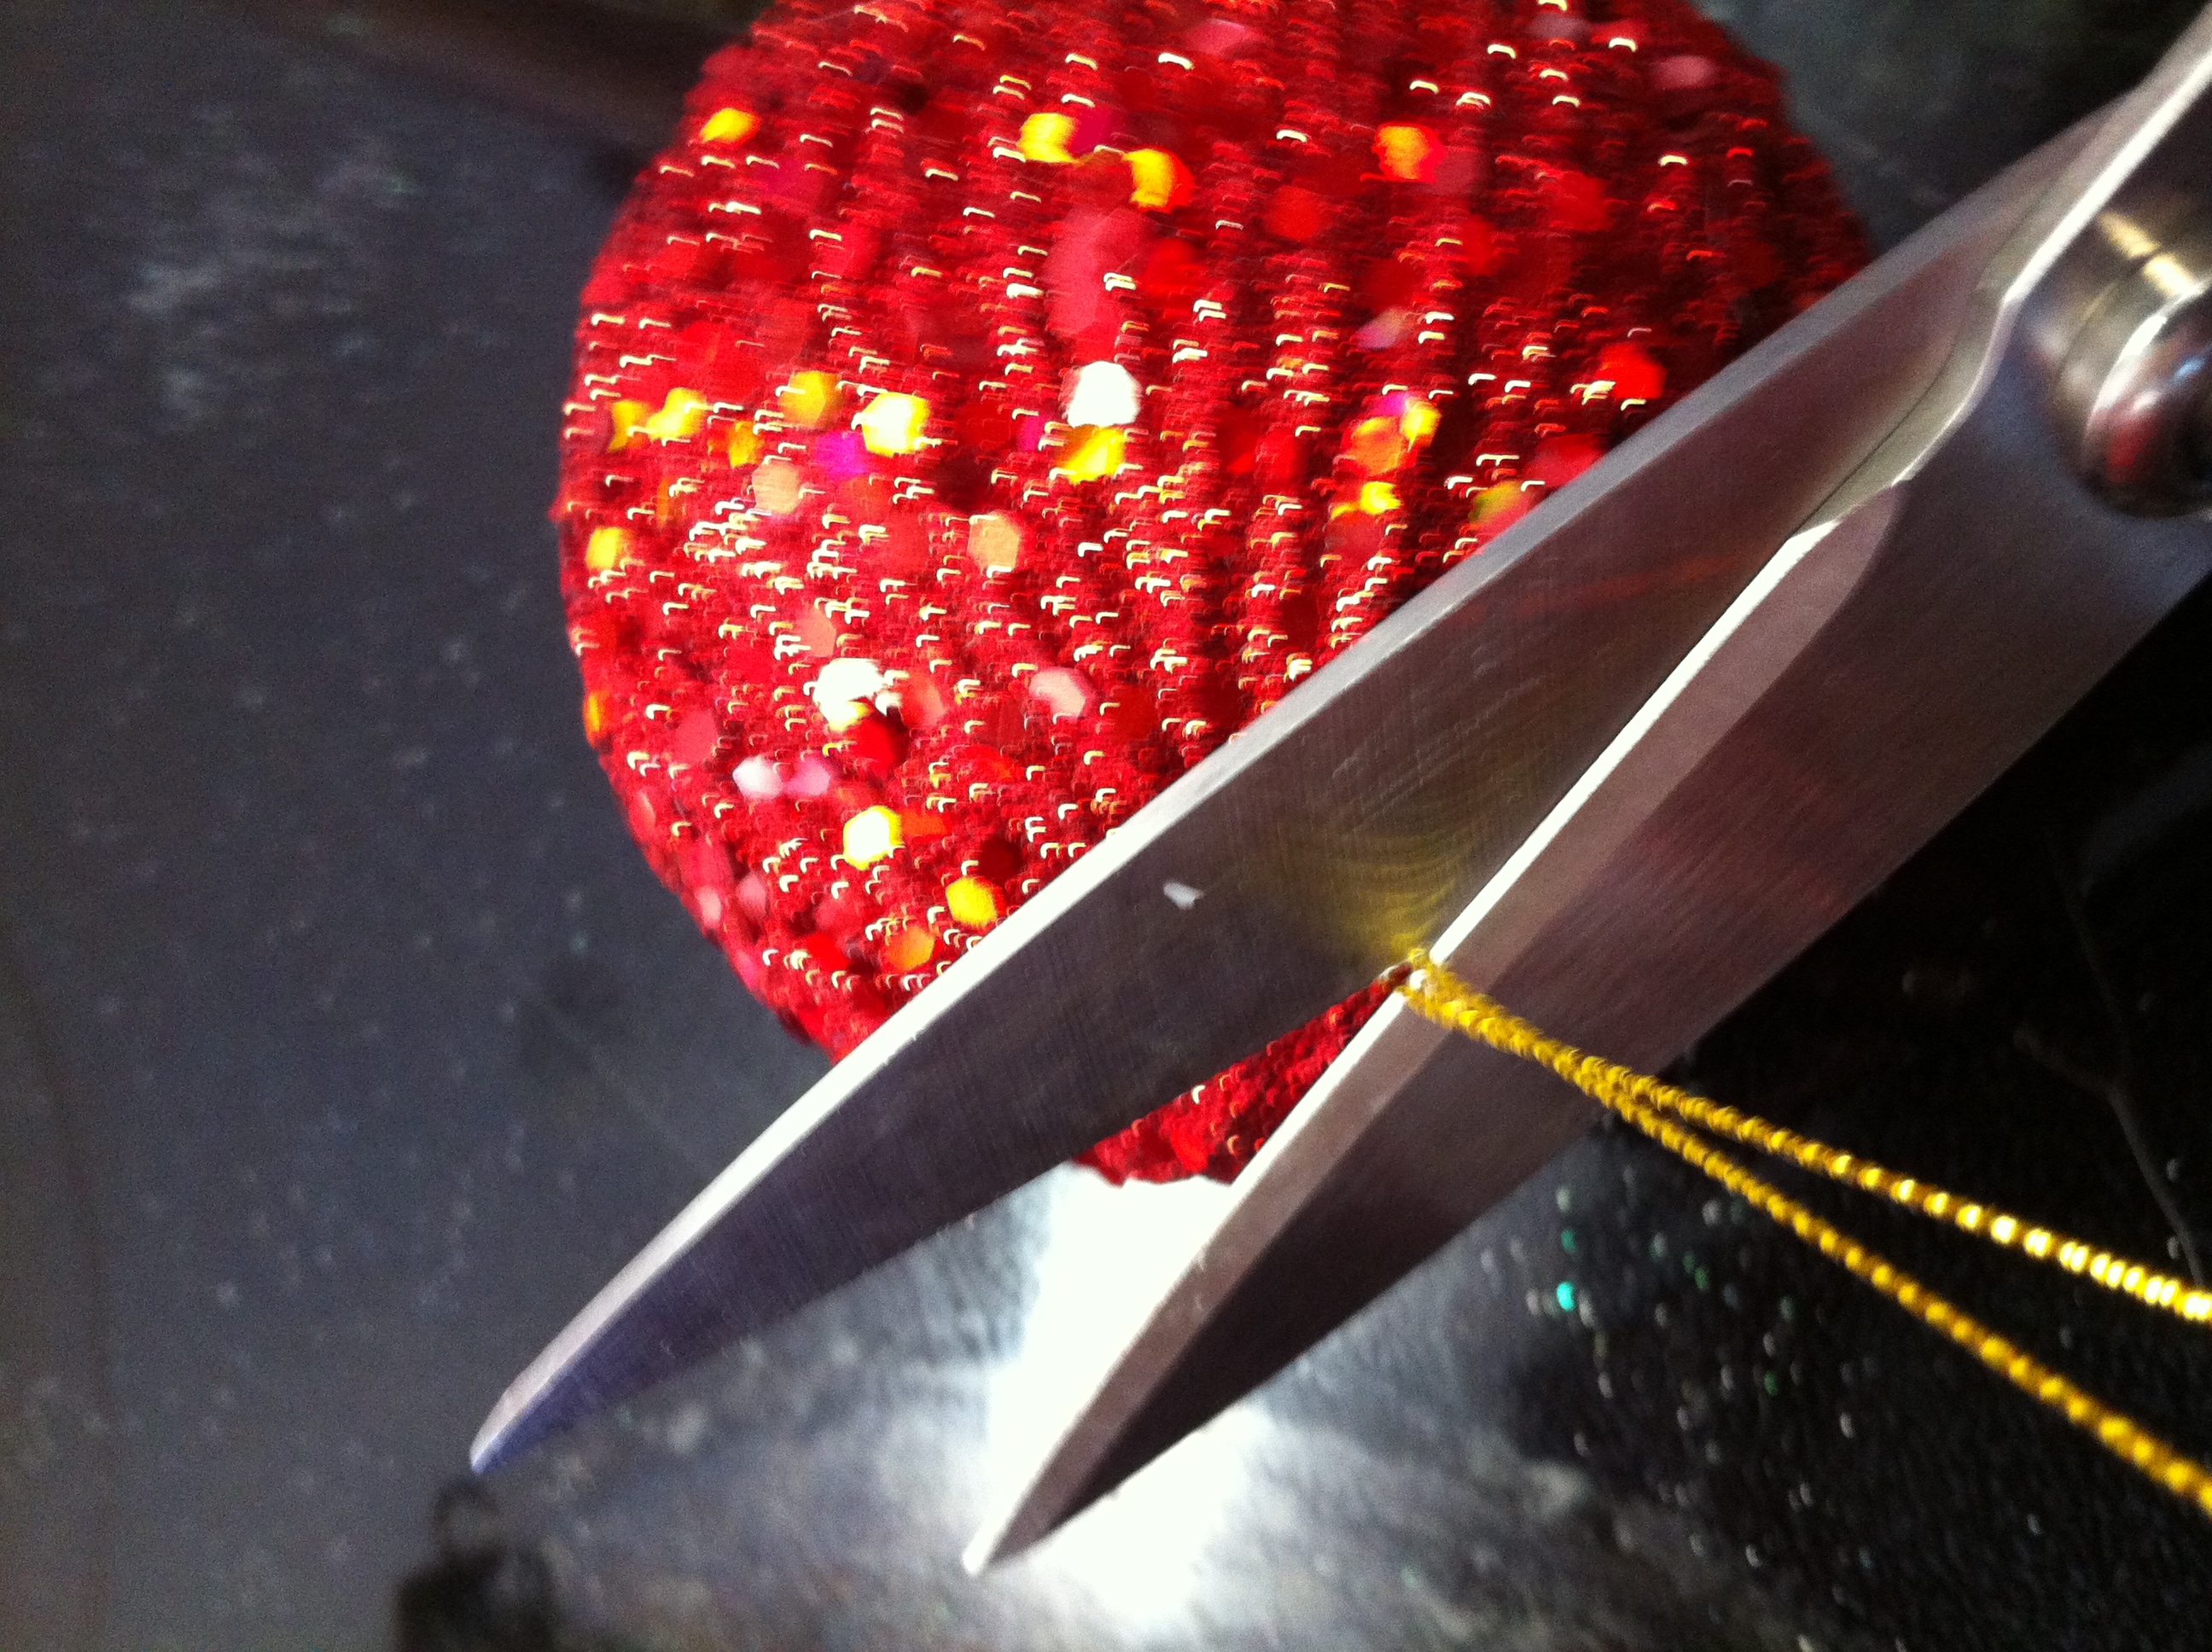
Use a hack saw (or another favorite saw of your choice) to remove the ornament-hook-holder-part from each small ornament.


Same deal as last time, fire up the glue gun and apply the glue in a donut shape where the sawed-off part used to be.


Eyeball the ears (yup, just had to say that again) and, after waiting a few seconds for the glue to cool down a smidge, slap those ears on.


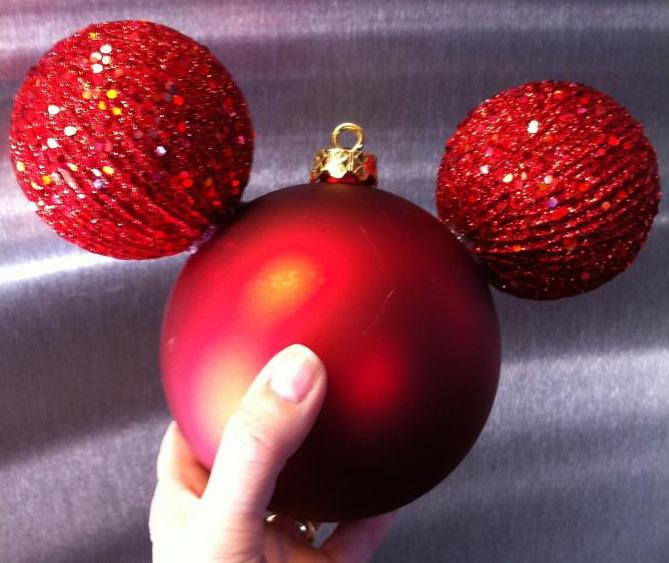
So, a teensy bit more difficult this time (what, with the sawing and all), but well worth the trouble.  Minty Mickey Mouse ornaments.  Made ‘em myself.

Saturday, December 6, 2014

DIY Mickey Mouse Christmas Ornaments - Part 1

By Lisa Green

IMG_1206
Christmas 2012

I love Christmas time.  Even in an empty nest – Christmas is exciting.  I start gearing up for the big day pretty early.  I have a nine-foot-tall artificial tree that takes some wrangling to assemble and then all those darn branches need to be fluffed…really makes me miss my
free labordarling children.  I’ve got to work in stages and although time consuming, it’s totally worth the effort.  What do I love best about my big brute of a tree?  It’s a Disney Tree!
Raymond and I started collecting Disney ornaments when we first got married.  Then, children tend to choose Disney ornaments (if you’re raising them right) when ornament buying opportunities present themselves.  I guess I should have known our tree would end up 100% Disney on a visit to Disney World a few years back….

Beginning Flashback Sequence…..
We took the bus to Downtown Disney.  As I leaped from the bus and started skipping along to my most favorite store of all…okay, there may have not been actual leaping and skipping, but that’s what I was doing in my mind…I felt a hand on my arm.  Turning to Raymond with a questioning look in my eye (that’s how married people communicate after a while), he looked at me very seriously and said, “Just have them ship it all home, okay?”  What? – Needed a sec to digest the implication – OKAY!  Yes, Dear, I will certainly do that.  You can count on me!  And off I skipped to Disney’s Days of Christmas.

So now we have a few Disney ornaments.  Enough to fill a 9-foot tree.  You think I’d be happy with that, but no, I still add ornaments every year.  This year I have two new ones I bought while cruising in the Mediterranean on the Disney Magic.  Enough?  Nope.  I like to make my own Disney ornaments too.  They’re easy and fun to make; plus you can save a bunch of money making them yourself – like maybe if you have to replace some broken ones or something.

IMG_2055

I made this ornament last weekend.  I’ve made this type before, but used sold black ornaments that were not shatter-proof – they turned out GREAT but now there aren’t many left (I’m not blaming anyone or naming names).  This year I was going for a little more sparkle (must have been thinking of Megan) when I hit the “50% off all Christmas decorations” sale at my favorite craft store.  Please, promise me, if you make these ornaments you will not pay full price.  Wait for a sale or download a coupon – you can always find a discount if you try.

IMG_2047 


Do this:
  • Use shatter-proof ornaments if you can.  Buy two sizes in any color you like that will work well together for the right effect.  I loved the sparkly red and was super thrilled that they had strings for hanging (instead of built-in plastic hook holders) that could easily be removed.
IMG_2051

  • Cut off the string right down at the very bottom.
  •  Fire up the glue gun and find the seam that runs around the big ornament you’re using for Mickey’s head – you want to glue the ears onto that seam.
  • No need to measure, just eyeball the ears (Ha!  EYEball the EARS!  Hahahhaha)…okay, I’m back.  Put the glue on in a donut shape right were the string used to be and glue those ears on, one at a time.  For best result, make the glue donut and wait 15 seconds (or so) for the glue to cool off a tiny bit before you stick the ears on.

That’s it.  Ta-Dah!  Easiest (and cutest) DIY Disney ornaments in the world.  Go.  Shop.  Make Some.

“…And call me when you get back, darling, I do enjoy our visits.”- Edna Mode, The Incredibles

This article was originally posted on the Living a Disney Life blog.

Sunday, November 30, 2014

Disney Vinylmations Jingle Smells Series 2 and 3

By: Nick

In 2011, Disney released a set of scented Vinylmations, called Jingle Smells, that could double as ornaments. They were nice, but, as they didn't feature any character, I only bought one initially, marshmallow, but did wind up with chocolate when I found it at the local flea market.

The following year, Disney released Jingle Smells Series 2, and I couldn't resist any of them!


To be honest, none of them smell very much like what they say they are supposed to smell like.
They all smell like vinyl, with one exception, which we'll get to down the line.
But the smell isn't the reason I bought these. It's because they are awesome!


These come with a ribbon for hanging.


Mickey "smells" like Gingerbread.


Goofy is peppermint. He is perpetually in this pose, as these Vinylmations are non-articulated.


Donald is chocolate. Looks like he's had a bit of a spill there.


 He sports a pair of novelty reindeer antlers and a scarf.


Last, but not least, we have Minnie, who smells like pie. She actually has the best scent, which is reminiscent of the smell of the pie that is wafted into the theater in the  Mickey's PhilharMagic attraction at Walt Disney World!


Last year's Jingle Smells Series has Mickey, Minnie, Goofy and Donald as Nutcrackers. 


Mickey smells like chocolate, and Minnie is strawberry shortcake scented. 


I bought Goofy and Donald.


Donald smells like a sugar cookie, Goofy like Peppermint.


Friday, November 28, 2014

Jingle Smells : Series 1

In 2011 the Disney Store released a Vinlymation set that really stinks.

Vinylmation: Jingle Smells Series 1 comes in 4 designs, each with it's own special aroma. And these Vinyls double as ornaments if you are so inclined!

Gingerbread


Peppermint


Chocolate


This was the only one that really caught my fancy at first, for the figure design more for the scent, marshmallow.
The packaging is beautiful, and even comes with a little scratch and sniff patch.


I've since picked up Chocolate, and got him at the Columbus Flea Market.

I need a snack. For some reason I'm in the mood for S'mores.

Tuesday, September 2, 2014

Disney's The Mighty Ducks of Anaheim Merchandise

By: Nick Maglio

As anyone who knows me will tell you, I'm not really a sports fan. I'll watch the occasional baseball or football game, but that's as far as it goes. So, what possessed me to purchase this Mighty Duck's merchandise? Where did I get it, and what did it cost?.
I have no idea.

I enjoyed the movie, but couldn't tell you one thing about it now, except that it's a movie about a hockey team starring Emilio Estevez. As a Disney Store Cast Member at that time, I felt obligated to see all the Disney Movies being released so I could discuss them with guests. At least that was my excuse.

Back to the merchandise.

Disney founded the Mighty Ducks Hockey team in 1993. I know this from this ornament, which tells me the Ducks inaugural season is 93-94. An ornament? Really? At least it's festive, with the confetti inside and all.


Maybe I bought this Matchbox car because it was a Limited Edition?


And then there is the hockey puck. If I remember correctly, I actually bought the case separately. The little cash register is dinging in my brain.


Disney sold the Mighty Ducks in 2005, but I still have this merchandise! Maybe that makes it worth more?