
Christmas 2012
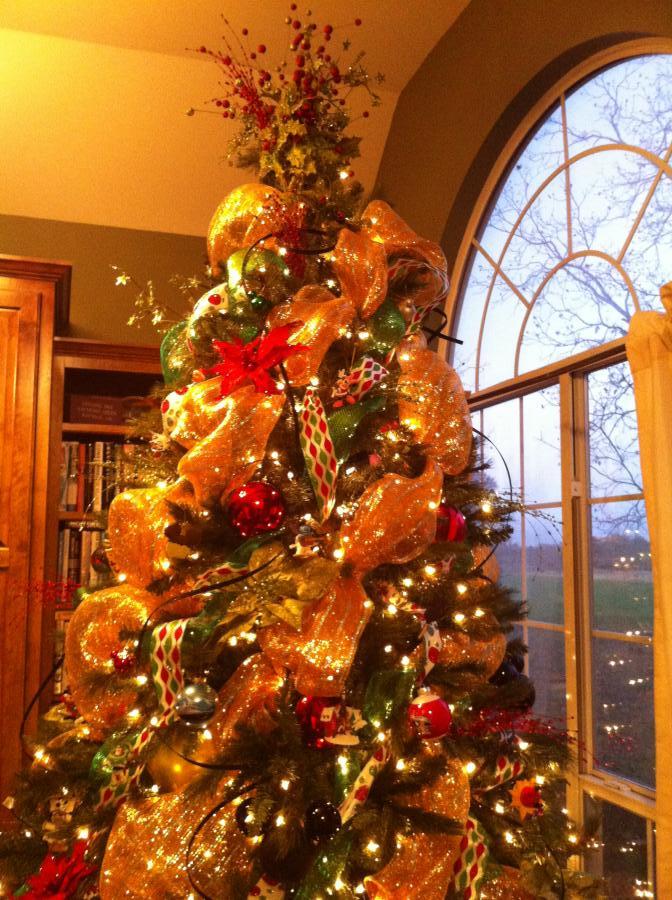
I love Christmas time. Even in an empty nest – Christmas is exciting. I start gearing up for the big day pretty early. I have a nine-foot-tall artificial tree that takes some wrangling to assemble and then all those darn branches need to be fluffed…really makes me miss my
Raymond and I started collecting Disney ornaments when we first got married. Then, children tend to choose Disney ornaments (if you’re raising them right) when ornament buying opportunities present themselves. I guess I should have known our tree would end up 100% Disney on a visit to Disney World a few years back….
Beginning Flashback Sequence…..
We took the bus to Downtown Disney. As I leaped from the bus and started skipping along to my most favorite store of all…okay, there may have not been actual leaping and skipping, but that’s what I was doing in my mind…I felt a hand on my arm. Turning to Raymond with a questioning look in my eye (that’s how married people communicate after a while), he looked at me very seriously and said, “Just have them ship it all home, okay?” What? – Needed a sec to digest the implication – OKAY! Yes, Dear, I will certainly do that. You can count on me! And off I skipped to Disney’s Days of Christmas.
So now we have a few Disney ornaments. Enough to fill a 9-foot tree. You think I’d be happy with that, but no, I still add ornaments every year. This year I have two new ones I bought while cruising in the Mediterranean on the Disney Magic. Enough? Nope. I like to make my own Disney ornaments too. They’re easy and fun to make; plus you can save a bunch of money making them yourself – like maybe if you have to replace some broken ones or something.
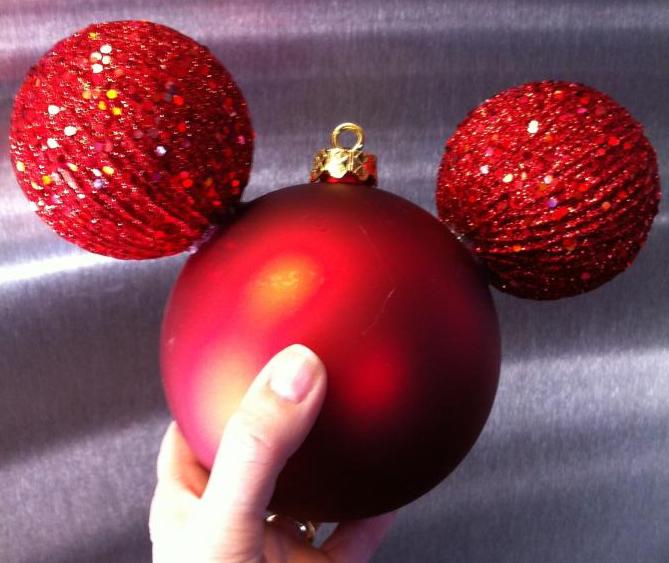
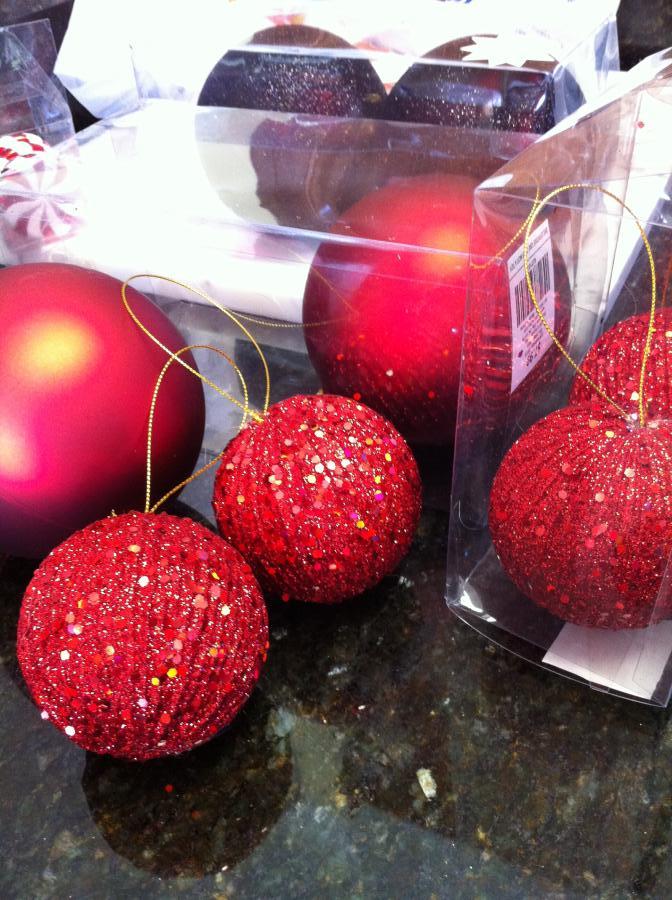
I made this ornament last weekend. I’ve made this type before, but used sold black ornaments that were not shatter-proof – they turned out GREAT but now there aren’t many left (I’m not blaming anyone or naming names). This year I was going for a little more sparkle (must have been thinking of Megan) when I hit the “50% off all Christmas decorations” sale at my favorite craft store. Please, promise me, if you make these ornaments you will not pay full price. Wait for a sale or download a coupon – you can always find a discount if you try.
Do this:
- Use shatter-proof ornaments if you can. Buy two sizes in any color you like that will work well together for the right effect. I loved the sparkly red and was super thrilled that they had strings for hanging (instead of built-in plastic hook holders) that could easily be removed.
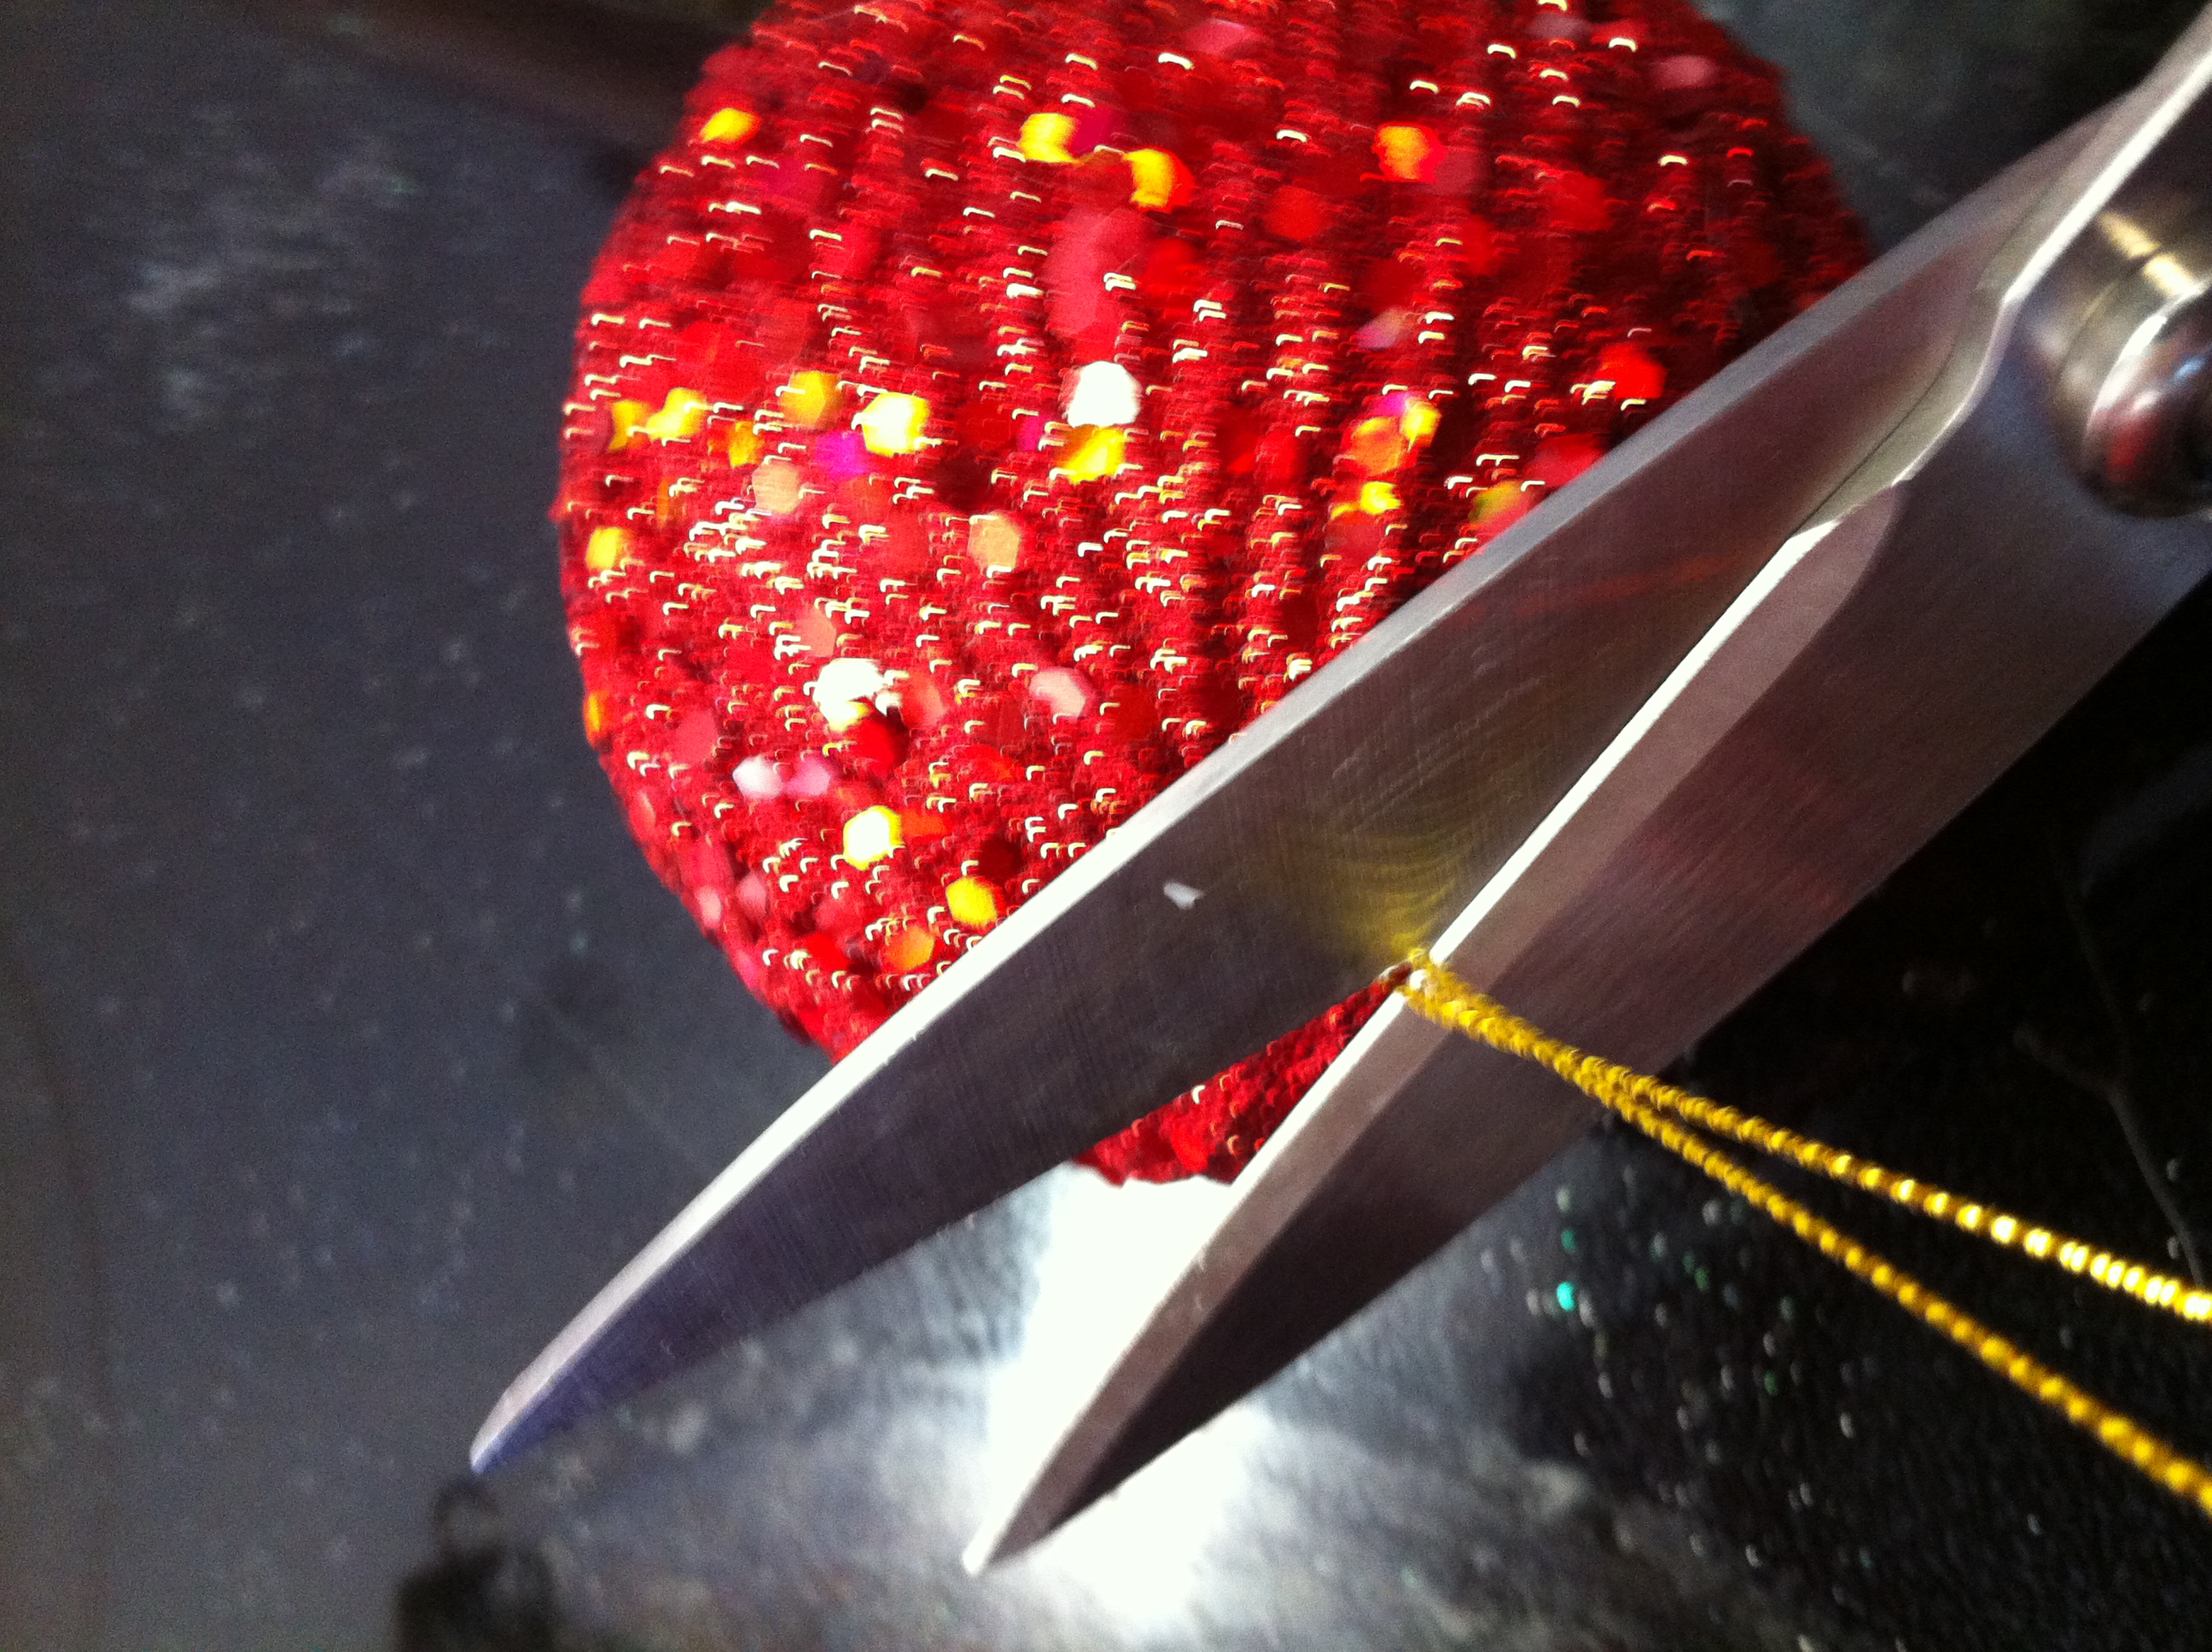
- Cut off the string right down at the very bottom.
- Fire up the glue gun and find the seam that runs around the big ornament you’re using for Mickey’s head – you want to glue the ears onto that seam.
- No need to measure, just eyeball the ears (Ha! EYEball the EARS! Hahahhaha)…okay, I’m back. Put the glue on in a donut shape right were the string used to be and glue those ears on, one at a time. For best result, make the glue donut and wait 15 seconds (or so) for the glue to cool off a tiny bit before you stick the ears on.

That’s it. Ta-Dah! Easiest (and cutest) DIY Disney ornaments in the world. Go. Shop. Make Some.
“…And call me when you get back, darling, I do enjoy our visits.”- Edna Mode, The Incredibles
This article was originally posted on the Living a Disney Life blog.
No comments:
Post a Comment
Thank you for your feedback. Comments will appear pending moderation.